
Have you ever dreamed of building a professional app but felt overwhelmed by the complexity of coding? What if I told you that you could create a no-code AI app—complete with beautiful design, user authentication, database integration, and even AI functionality—all from a single prompt? Moreover, you wouldn’t need to hire developers, learn programming languages, or spend months in development.
Sounds too good to be true? Well, believe me, it’s not! In fact, I recently created a complete project management app in just 10 minutes, and I’m about to show you exactly how you can do the same.
The Problem with Traditional App Development
Let’s be honest—most project management tools on the market today are either:
- Overly complicated with messy interfaces that take weeks to understand
- Prohibitively expensive with subscription costs that drain your budget
- Frustratingly limited in customization options
- Time-consuming to implement, requiring extensive developer involvement
Furthermore, if you’ve ever tried building an app from scratch, you know the pain points all too well. You’ve probably spent countless hours wrestling with code, debugging errors, and trying to make sense of complex frameworks. Additionally, hiring developers can cost tens of thousands of dollars, and even then, there’s no guarantee the final product will match your vision.
But what if there was a better way?
Introducing Rocket: The Best AI App Builder for 2025
Rocket.new is revolutionizing the way we build applications. Essentially, it’s like having an entire development team—a UX designer, a full-stack developer, and a product strategist—working with you in real-time, all right inside your browser.
In contrast to traditional development methods, Rocket uses advanced AI to transform your ideas into production-ready applications. Whether you need a web app, mobile app, landing page, or internal tool, Rocket.new handles everything from design to deployment seamlessly.
What Makes Rocket Different?
Unlike other no-code platforms that require you to prompt for every single page and feature separately, Rocket takes a revolutionary approach. Specifically, you describe your vision once, and the AI generates a complete, fully functional application. This includes:
- Frontend design with modern, responsive layouts
- Backend logic and database integration
- User authentication systems
- API connections and third-party integrations
- Production-ready code that you actually own
Moreover, Rocket automatically fixes errors as they occur, ensuring your app runs smoothly from the start. Consequently, you spend less time debugging and more time refining your product.
How to Build an App Without Code: Step-by-Step Tutorial
Now that you understand what Rocket can do, let’s dive into the practical steps. I’ll walk you through the exact process I used to build a complete project management app in just 10 minutes.
Step 1: Create Your Account and Structure Your Prompt
First and foremost, head over to the Rocket.new website and create your account. Once you’re logged in, you’ll immediately see the prompt interface where the magic happens.
However, before jumping in, it’s crucial to structure your prompt correctly. Therefore, I highly recommend checking out Rocket’s documentation to understand best practices. In general, you want to keep your prompts:
- Specific – Clearly define what you want
- Simple – Use straightforward language
- Descriptive – Include all necessary features
For example, here’s the prompt I used for my project management app:
“Create a Project Management Web App with the following features: Dashboard with team progress overview, task boards with drag-and-drop functionality, sprint management for short-term milestones, analytics with graphs showing team performance, team management page with user profiles, and individual profile pages. Include user authentication with Supabase, where users can login as either Admin or Team Member. Admins can manage all tasks and view reports, while Team Members can only see their assigned tasks.”
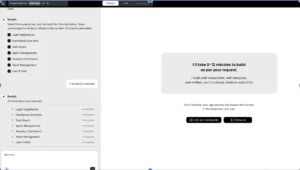
Step 2: Choose Your Framework and Screens
After submitting your prompt, Rocket will first ask you to select a framework. While you can customize this according to your preferences, I recommend going with the default framework for beginners. Subsequently, Rocket will present a list of screens to include in your app.
Naturally, I selected all available screens because I wanted a fully-fledged application with comprehensive features. Additionally, during the build process, you’ll see real-time updates in the chat interface, showing exactly what Rocket is creating.
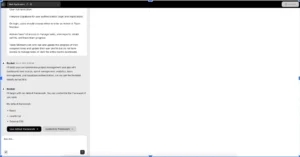
Step 3: Watch the Magic Happen (Literally!)
Now comes the exciting part—watching Rocket build your app in real-time. Typically, the generation process takes around 10-15 minutes, depending on complexity. Meanwhile, you can monitor progress through the chat interface.
What’s particularly impressive is Rocket’s error-handling capability. Whenever an issue occurs during generation, Rocket automatically analyzes and fixes it without any manual intervention. How cool is that? Indeed, you don’t need to write or edit any code—just a single click, and problems are resolved!
Once generation completes, you’ll see a green checkmark indicating success. Subsequently, Rocket will prepare a preview of your application.
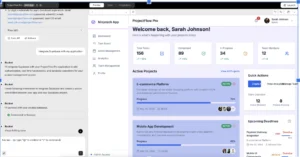
Step 4: Explore Your Brand-New App
When the preview loads, prepare to be amazed. Just with a single prompt, you’ll see:
- A sleek, responsive dashboard that adapts perfectly to both desktop and mobile
- Modern design with professional aesthetics right out of the box
- Functional components including navigation, forms, and interactive elements
- Smooth user experience with intuitive layouts
Furthermore, the level of detail is honestly impressive. Everything from color schemes to component placement reflects modern design principles without requiring any design expertise from you.
No-Code AI App Development Customization:
While the initial generation is impressive, Rocket truly shines when it comes to customization. Let’s explore the powerful visual editor that lets you personalize every aspect of your app.
The Visual Editor: Live Editing Made Easy
One of Rocket’s coolest features is the ability to live-edit your app right in front of you. For instance, I wanted to make several customizations to match my brand:
Changing the App Name: Simply click on the text element and type your new name. Instantly, it updates across the entire application.
Updating the Logo: Even more impressively, I attached a screenshot of my new logo and gave Rocket this simple prompt: “Change the logo to this file.” Within seconds, the logo was updated throughout the app!
Adjusting Colors: Similarly, tweaking colors is incredibly intuitive. I clicked on the Active Projects section and adjusted the blue tone to match my brand palette. Alternatively, you can change the entire color scheme at once.
For example, I uploaded a screenshot and said: “Change my entire app color scheme according to this screenshot.” Rocket instantly updated the whole app to match! Even better, if you don’t like a change, just click Rollback to return to your previous version.
Advanced Customization with Commands
To streamline your workflow even further, Rocket.new offers powerful command features. Specifically, there are two main types:
Forward Slash (/) Commands: These are quick shortcuts that trigger built-in actions. For instance:
/update logo– Brings up a menu to change your logo/fix layout issues– Automatically cleans up layout inconsistencies/generate image– Creates placeholder images or new visuals
Context (@) Commands: These commands help you target specific files or sections. For example:
@team make background image darker– Only affects the Team page@dashboard update color scheme– Changes only the dashboard section
Consequently, these commands give you surgical precision without touching any code, making every change intentional and controlled.
For Developers: Rocket AI Code Export and Version Control
Although Rocket is perfect for non-technical users, it also provides powerful features for developers. Specifically, Rocket includes code diff capabilities that let you track every change.
Additionally, you can:
- View and edit source code directly if needed
- Download the complete codebase for local development
- Push to GitHub for professional version control
- Add custom code to extend functionality
As a result, you maintain complete ownership and flexibility over your application. This is crucial because you’re not locked into Rocket’s platform—you can take your code anywhere.
Integrations: Connecting to Your Favorite Tools
Now, let’s talk about one of Rocket’s most powerful aspects—integrations. To demonstrate, I’ll show you how to connect Supabase for user authentication.
Setting Up Supabase Authentication
First, click the Connect button in Rocket’s interface. Then, enter your Supabase credentials (project URL and API key). Within moments, your app is connected to a production-grade database with built-in authentication.
However, Supabase is just the beginning. Rocket supports numerous integrations including:
- Stripe – For subscription payments and e-commerce
- Twilio – For SMS notifications and alerts
- Google Analytics – For tracking app performance and user behavior
- Firebase – For real-time data synchronization
- Netlify – For seamless deployment and hosting
Consequently, you can build feature-rich applications that rival professionally developed products, all without writing backend code.
User Roles and Authentication: A Real-World Example
Let me show you how the authentication system works in practice. When users reach the signup page, they can choose their role: Admin, Manager, or Team Member.
Manager View and Capabilities
For this demonstration, I logged in as a Manager. Immediately, I gained access to:
- Task management with full CRUD operations
- Progress tracking with visual indicators
- Status filters (To Do, In Progress, Completed)
- Sprint management for organizing work into time-boxed periods
Moreover, as a Manager, I can easily add and edit sprints, ensuring the team stays focused on short-term milestones. Honestly, this level of functionality would typically require months of development work.
The Control Flow Advantage
What I particularly love about this tool is how it simplifies project control. You can effortlessly:
- Assign tasks to team members
- Track progress across multiple projects
- Filter and sort tasks based on priority
- Monitor team performance through analytics
Furthermore, the interface makes all these complex operations feel natural and intuitive.
Publishing Your No-Code AI App Development Project:
Once you’re satisfied with your app, it’s time to share it with the world. Fortunately, Rocket makes deployment incredibly simple.
The One-Click Deployment Process
First, click the Launch button in Rocket’s interface. Next, you’ll be prompted to choose your deployment method. For most users, I recommend starting with Netlify integration because it’s:
- Free to start with generous limits
- Fast to deploy (usually under 2 minutes)
- Reliable with global CDN distribution
- SSL-enabled for secure connections
After linking your Netlify account, simply select “Launch on Web” (or “Launch on Custom Domain” if you have one). Then, complete the process, and voilà—your app is LIVE!
Within minutes, you’ll receive a public URL that you can share with users, investors, or clients. For example, my project management app went live at a URL like: projectflow-pro.netlify.app
Rocket vs. Competitors: Why It Stands Out
Having tested multiple no-code platforms, I can confidently say that Rocket.new offers unique advantages. Let me break down the comparison:
Rocket vs. Bubble
While Bubble is powerful, it has a steep learning curve and requires manual page-by-page construction. In contrast, Rocket generates complete apps from single prompts.
Rocket vs. Webflow
Webflow excels at visual design but lacks backend logic and app functionality. Conversely, Rocket provides full-stack development out of the box.
Rocket vs. Traditional Coding
Coding offers ultimate flexibility but requires significant expertise and time. Meanwhile, Rocket delivers 80% of the functionality with 10% of the effort.
Real-World Use Cases: Who Should Use Rocket?
Based on my experience, Rocket is perfect for:
Entrepreneurs and Startups
Launch your MVP quickly to validate ideas without burning through capital. Additionally, iterate based on user feedback without expensive developer contracts.
Small Business Owners
Create internal tools, customer portals, or booking systems tailored to your specific needs. Moreover, save thousands on custom development while maintaining professional quality.
Freelancers and Agencies
Deliver client projects faster than ever before. Furthermore, take on more projects simultaneously without increasing headcount.
Non-Technical Founders
Turn your vision into reality without learning to code or depending on technical co-founders. Subsequently, maintain control over your product roadmap.
Students and Learners
Build portfolio projects that demonstrate real functionality. In addition, experiment with different app ideas without risk or cost.
No-Code AI App Development Pricing
Rocket operates on a token-based pricing model, which offers flexibility based on usage. Here’s what you need to know:
Free Tier Benefits
- 2 million total tokens
- 1 million tokens per week
- Natural language chat for iterations
- Figma-to-code for up to 2 screens
- Full access to core features
Paid Plans
For production projects requiring more tokens, paid plans scale according to complexity. However, even with paid plans, Rocket typically costs 90% less than traditional development.
Tips for Successful No-Code AI App Development with Rocket
After building multiple apps with Rocket, I’ve learned several best practices:
1. Start with Clear Requirements
Before prompting, outline exactly what you need. Specifically, list all features, user roles, and integrations upfront.
2. Use Templates When Available
Rocket offers pre-built templates that can save significant time. Consequently, starting from a template reduces token usage while providing professional structure.
3. Leverage Community Resources
Join Rocket’s community to learn from other builders. Additionally, share your own templates and solutions to help others.
4. Iterate Gradually
Rather than requesting massive changes at once, make incremental adjustments. This approach ensures better results and uses tokens more efficiently.
5. Test Thoroughly
Before deploying, test all user flows and edge cases. Subsequently, use Rocket’s rollback feature if issues arise.
Common Questions and Concerns
Will My App Be Production-Ready?
Absolutely! Rocket generates clean, scalable code that meets industry standards. Moreover, many businesses already run production applications built with Rocket.
What If I Need Custom Features Later?
Since you own the code, you can always hire a developer to add custom functionality. Furthermore, you can continue using Rocket for future updates.
How Secure Are Rocket-Built Apps?
Security depends on your integrations (like Supabase or Firebase), which are enterprise-grade solutions. Additionally, Rocket follows security best practices in code generation.
Can I Use Rocket for E-Commerce?
Yes! Integrate Stripe for payments, and you can build full e-commerce platforms. Similarly, you can create subscription-based services with recurring billing.
The Future of No-Code AI App Development in 2025 and Beyond
Rocket represents a fundamental shift in how we think about software creation. Previously, building apps required either significant technical skills or substantial financial resources. Now, however, anyone with an idea can bring it to life.
This democratization of app development has profound implications:
- Reduced barriers to entrepreneurship enable more innovation
- Faster iteration cycles lead to better products
- Lower costs make technology accessible to all
- Increased competition drives quality improvements across the industry
Furthermore, as AI continues to evolve, tools like Rocket will become even more powerful, potentially handling increasingly complex requirements with the same ease.
Is Rocket AI the Best No-Code App Builder for You?
After building multiple applications with Rocket, I can confidently recommend it for anyone looking to:
- Launch ideas quickly without technical bottlenecks
- Test product concepts before committing major resources
- Build internal tools that improve business operations
- Create client deliverables efficiently as a freelancer or agency
- Learn app development concepts through hands-on experience
However, Rocket may not be ideal if you:
- Need extremely specialized functionality that requires custom algorithms
- Require offline-first mobile apps with complex synchronization
- Want to build operating-system-level applications
- Need full control over every single line of code from day one
That said, for the vast majority of web and mobile app projects, Rocket provides an unbeatable combination of speed, quality, and cost-effectiveness.
Ready to Build Your Own App?
If you’re ready to transform your app idea into reality, there’s no better time to start than now. With Rocket.new, you can go from concept to live application in less time than it takes to watch a movie.
Here’s what to do next:
- Visit Rocket.new (no-code ai app development) and create your free account
- Explore the documentation to understand prompting best practices
- Start with a simple project to familiarize yourself with the platform
- Experiment with templates to see what’s possible
- Join the community to learn from experienced builders
Remember, every expert builder started exactly where you are now. The only difference between having an idea and having a live app is taking that first step.
So stop waiting for the perfect moment or the perfect skillset. Open Rocket, describe your vision, and watch as AI transforms your words into a working application. The future of app development is here, and it’s more accessible than ever before.
Ready to build? Click here to start with Rocket today!
FAQ
1: Do I need any coding knowledge to use Rocket?
No! Rocket.new (No-Code AI App Development) is designed for complete beginners. You simply describe what you want in plain English.
2: How long does it take to build an app with Rocket?
Most apps are generated in 10-15 minutes, though complex applications may take up to 25 minutes.
3: Can I use Rocket for commercial projects?
Absolutely! You own all the code Rocket generates and can use it commercially without restrictions.
4: What types of apps can I build?
Web apps, mobile apps, internal tools, dashboards, landing pages, and more—if you can describe it, Rocket.new can build it.