In this article, I will explain how to use loops in atmega32 and loop types using AVR Atmega32 Microcontroller using Atmel Studio. A loop is a collection of directives that are executed continuously until a specific condition is met. A conditional check, such as determining whether a counter has reached a certain value, usually comes after a certain action, such as receiving and updating some data.
Video Loops in atmega32
Moreover, If you want to perform and understand Loops in atmega32. Then, please watch this Video given below
Types of Loops in atmega32
There are two types of loops.
Infinite loops
Infinite loops are those types of loops in which instructions are executed infinitely.
Finite loops
The body of finite loops in the Repeat class runs through a predetermined number of times.
Now that we have a program to understand loops, we can.
Code Explanation of Loops in atmega32
LDI R16, 0X00
A Hex value has been placed into a general-purpose register.
We’ll make a loop now. A colon “:” is used to establish a loop.
LOOP:
The entire set of instructions that we will carry out will fit inside this loop.
For instance, we would write this if we wanted to increment R16.
INC R16
It will gradually increase R16’s value by 1 over time.
The loop must be closed as well. We can finish up with JMP or RJMP.
RJMP LOOP
We prefer to use relative JMP since it runs faster and consumes less cycles than simple JMP.
Additionally, we employ it when our jump is brief. Give the name of the loop we must enter.
BREAK
Execute the Program
Continuing to execute the software.
Create the program or press F7 to launch it.
The program will then be debugged by pressing the F10 key.
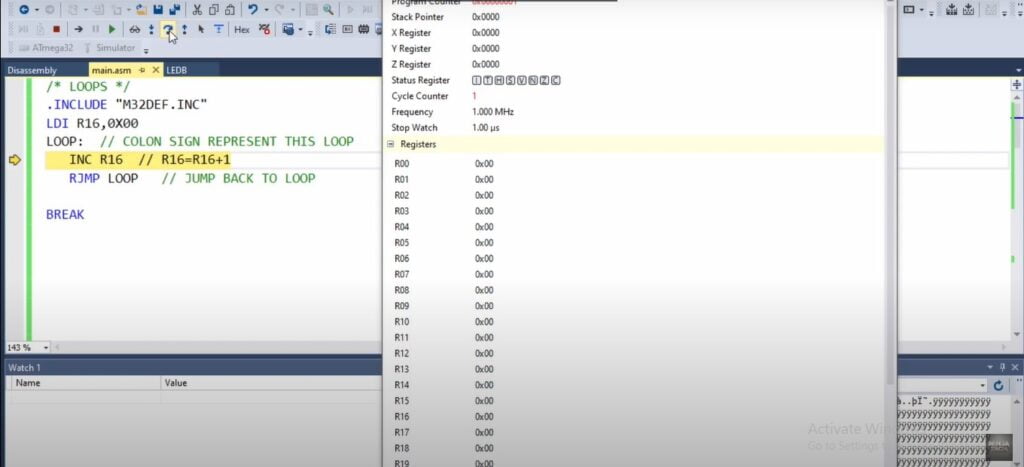
Check the processor’s state now, then go through the code.
First, we’ll note that R16 originally has a value of 0.
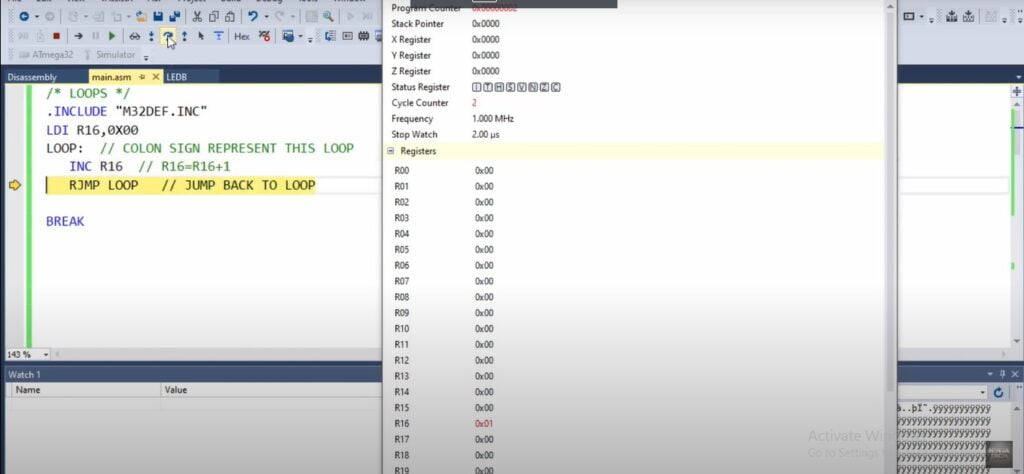
Now that the incrementing phase has been completed, check the value.
As seen in the picture, the value has now increased by 1.
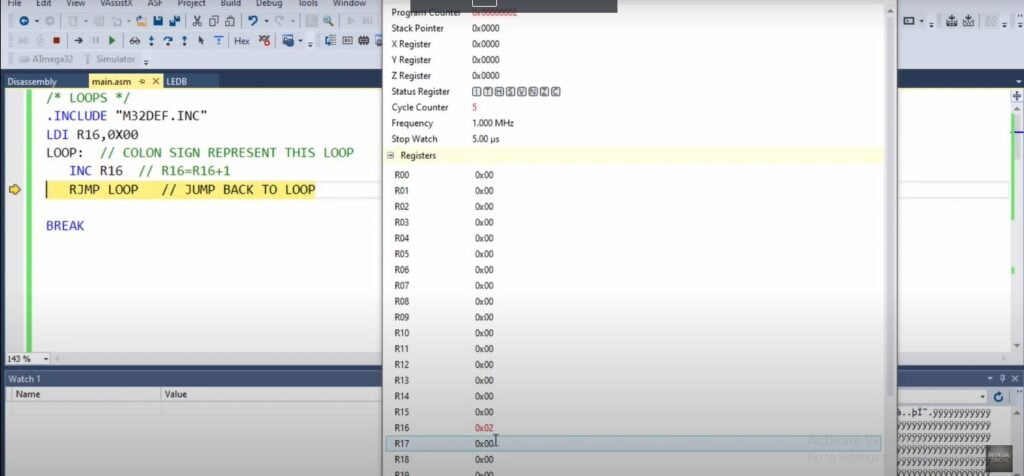
It will repeatedly enter the loop because it is an infinite loop with no end.
You can now see that it has been increased by 1 and now reads as 2.
It will implement infinitely without any outside conditions.
Concept of Finite loops.
Now we will understand the concept of Finite loops.
LDI R16, 0X00
X represents the Hexa value.
LDI R17, 10
It is a decimal value.
LOOP:

INC R16

DEC R17

BRNE LOOP
It is talking about “Branch if not equal.” If our Z flag’s value is not zero, this command is still valid.
When our final value is 0, the Z flag changes to 1.
Press the F7 key to generate the code. then debug it by pressing the F10 key.
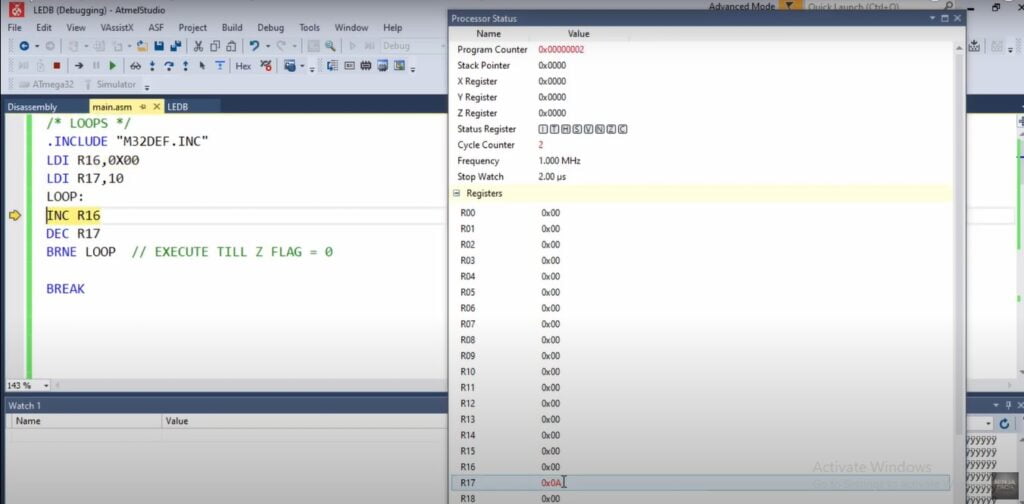
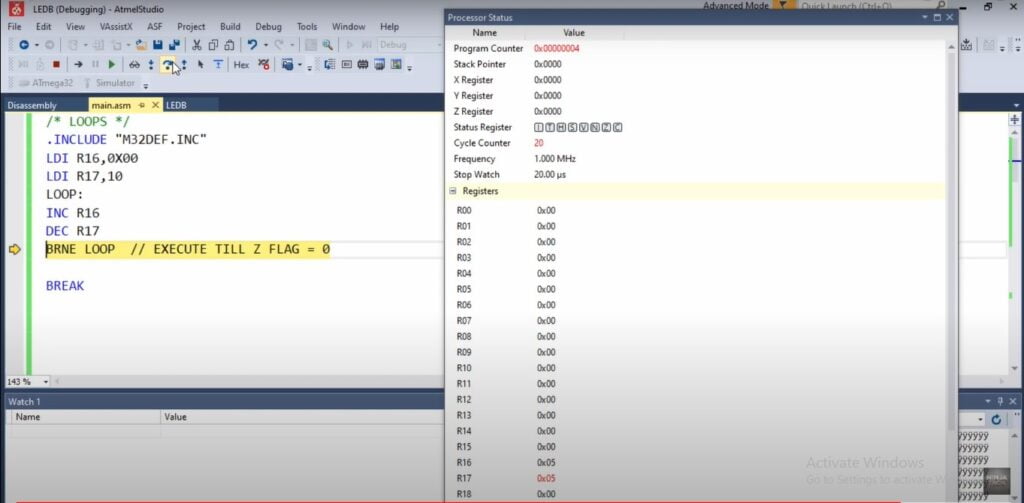
The graphic below shows that R16 has a value of 0 loaded.
Although we loaded a decimal number, R17 was initially loaded with a hexadecimal value by Atmel Studio.
After the increment, R16’s value changes to 1, and R17’s value is loaded with the number 9.
As you can see, the Z flag has not yet been raised because the previous register contains a non-zero value of 9, which is visible.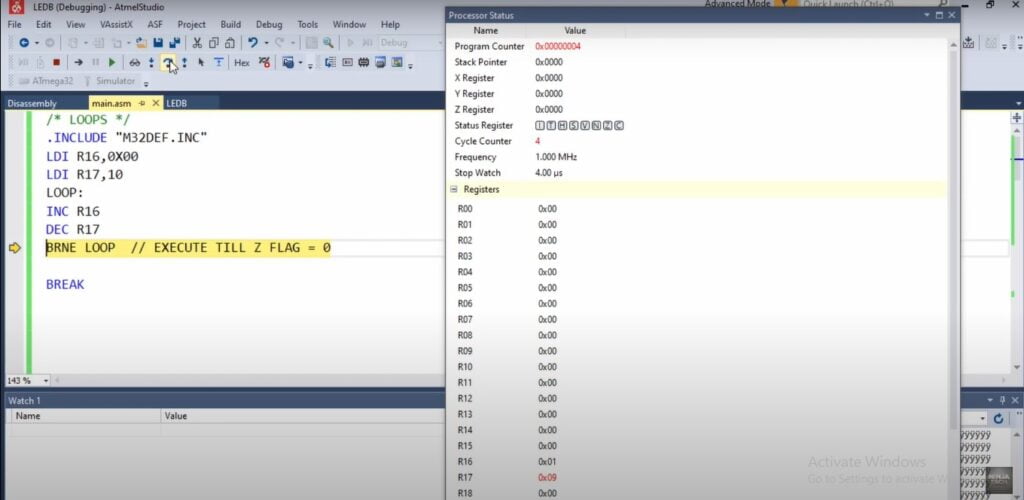
Once more jumping to the loop, you can see that R16’s value is rising and R17’s is falling by one. While the R16 value is 2, the R17 value is 8, when the R16 value is 3, the R17 value is 7, when the R16 value is 4, the R17 value is 6, and when the R16 value is increased to be 5, the R17 value is decremented by 1 and becomes 5. The cycle will continue until the value drops to zero.
In this case, our loop will come to an end. As you can see, the Z flag is also raised since the preceding register now has a zero value, which is a non-zero value, and the final value after the increment becomes “A,” which is 10; also, the value of R17 becomes zero.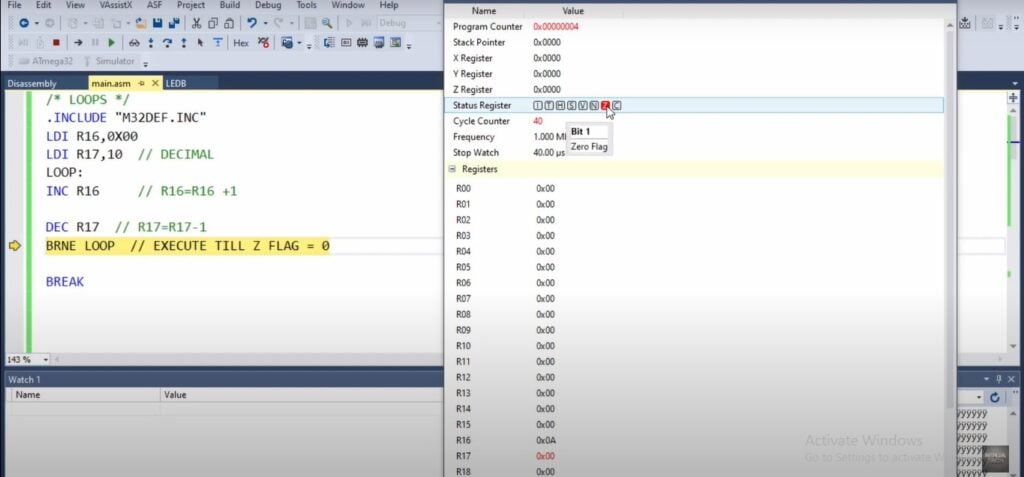
Code
.INCLUDE "M32DEF.INC"
LDI R16,0X00
LDI R17,10  // DECIMAL
LOOP:
 INC R16     // R16=R16 +1
 DEC R17  // R17=R17-1
BRNE LOOP  // EXECUTE TILL Z FLAG = 0
BREAK
Additionally, If you want to see the project Water Level Indicator Using Atmega32 then visit our website.


