
When it comes to microcontroller programming, accuracy and productivity are critical. Knowing what microcontrollers can do becomes crucial as individuals and experts explore the depths of embedded systems. A popular AVR microcontroller family member the Atmega32 is well-known for its adaptability and strong performance. This article concentrates on a single area of Atmel Studio 7 development environment programming: value checking with the Assembly language SBIS (Skip if Bit in Register is Set) command.
SBIS in Atmega32
/*
A Switch is connected to PORTB. Write a program to check the status of the switch and perform the following.
- If SW = 0 then send character N to PORTD
- If SW = 1 then send character Y to PORTD */
Let us understand it through a program in assembly language.
Firstly, we will include a header file.
.INCLUDE “M32DEF.INC”
If you do not know how to include it, you can check by clicking here.
LDI R16,HIGH(RAMEND)

OUT SPH, R16

LDI R16,LOW(RAMEND)

OUT SPL,R16                            // INITIALIZING  THE STACK
For initializing the stack, we OUT the High(RAMEND) on the SPH and we OUT the Low(RAMEND) on the SPL. Here SPH means Stack Pointer High and SPL means Stack Pointer Low.
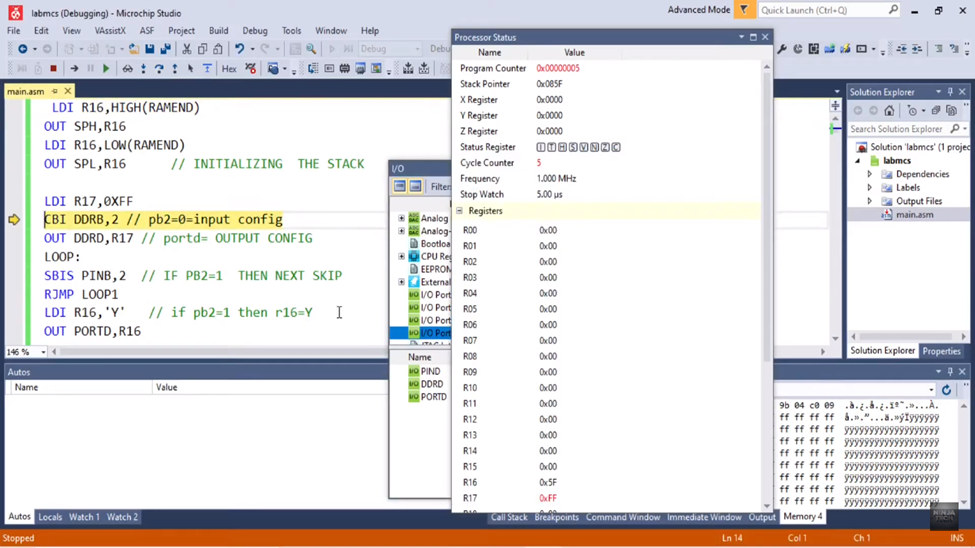
LDI R17,0XFF

CBI DDRB,2                              // pb2=0=input config

OUT DDRD,R17                     // portd= OUTPUT CONFIG
Then we loaded the immediate value i.e., FF in the general purpose register R17. Then we configured pin 2 of port B as input. CBI command loads the zero value on that pin and when it comes to the data direction register it configures it as input. Then we OUT the value of the general purpose register R17 on the data direction register D.
LOOP:

SBIS PINB,2                           // IF PB2=1  THEN NEXT SKIP

RJMP LOOP1

LDI R16,'Y'                             // if pb2=1 then r16=Y

OUT PORTD,R16

JMP LOOP
As we discussed in the previous blog, what the SBIS command does is, skip the next instruction if the value on the port is 1.
So, if the value is 1 it skips the next instruction and loads the ASCII character Y in the general-purpose register R16. Y is not an ASCII value it is an immediate value as it has the hex value on the backend. And then we OUT that ASCII value on port D.
LOOP1:

      LDI R16, ‘N’                   // if pb2=0 then r16=N

      OUT PORTD, R16

       RJMP LOOP1
But in case the value is not 1 on pin 2 of port B command it will jump to loop1. In loop1, it loads the ASCII character N in the general-purpose register R16. And then it OUTPUTs that value on port D. And then it will jump to LOOP1.
Now we will build and debug our program and check the output.
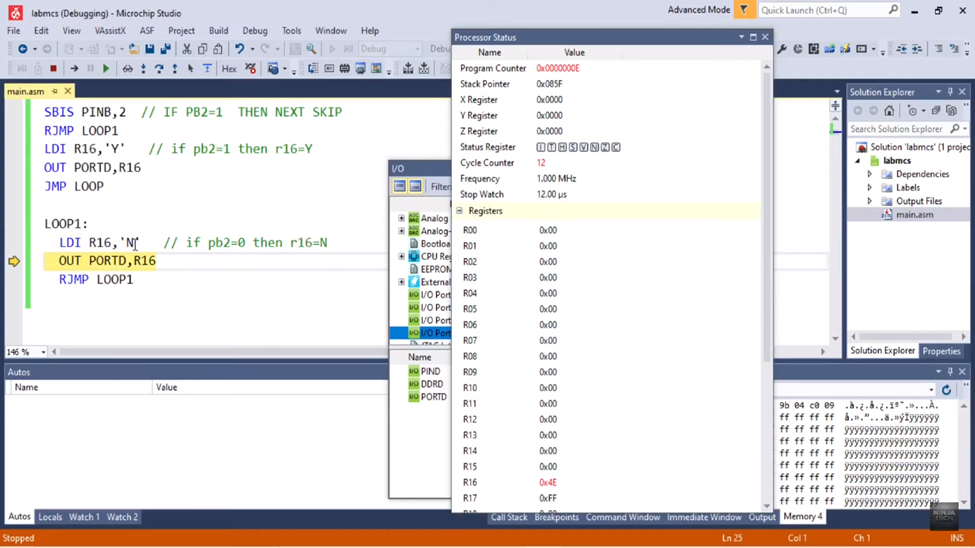
After initializing the stack, we see it has loaded the FF value in R17.
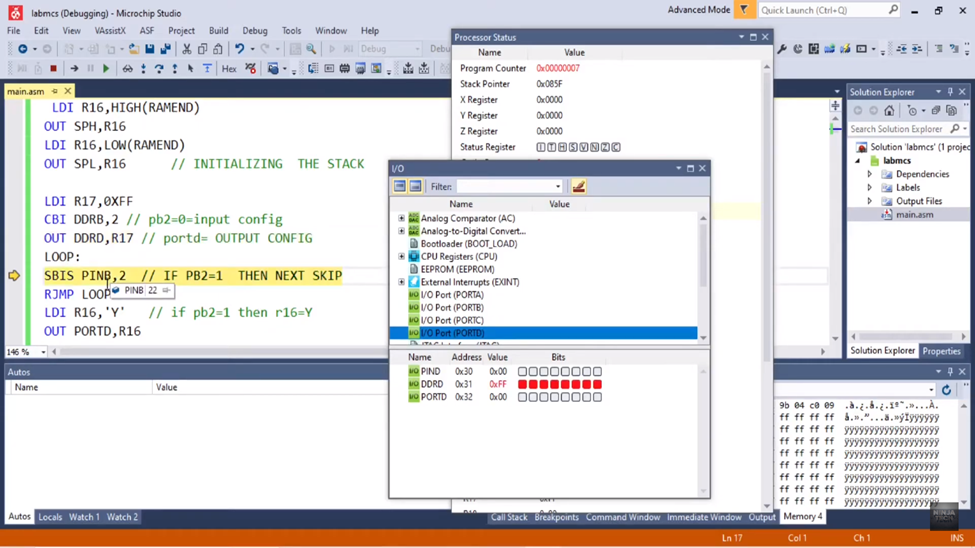
Now bit 2 of port B has the 0 value as you can see below. So, it will not skip the next instruction and goes to loop1.
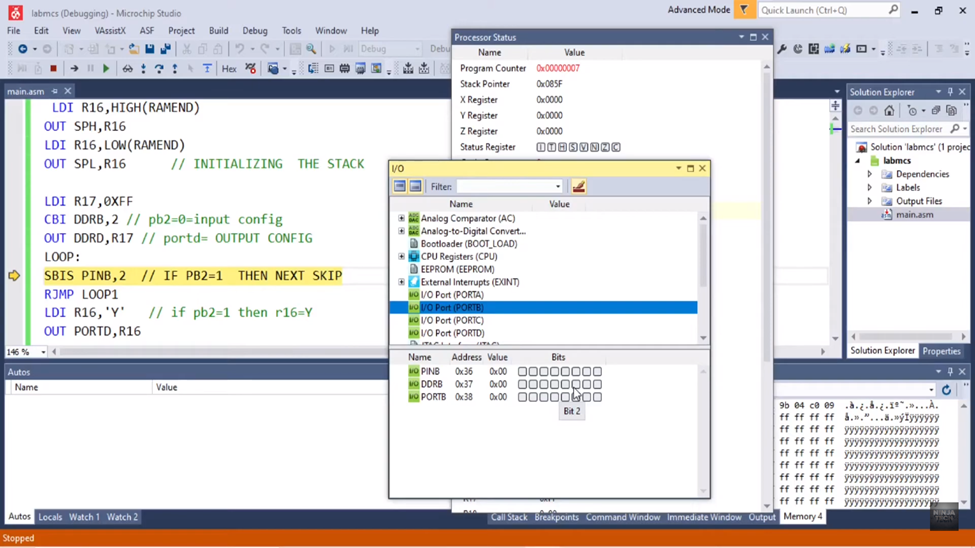
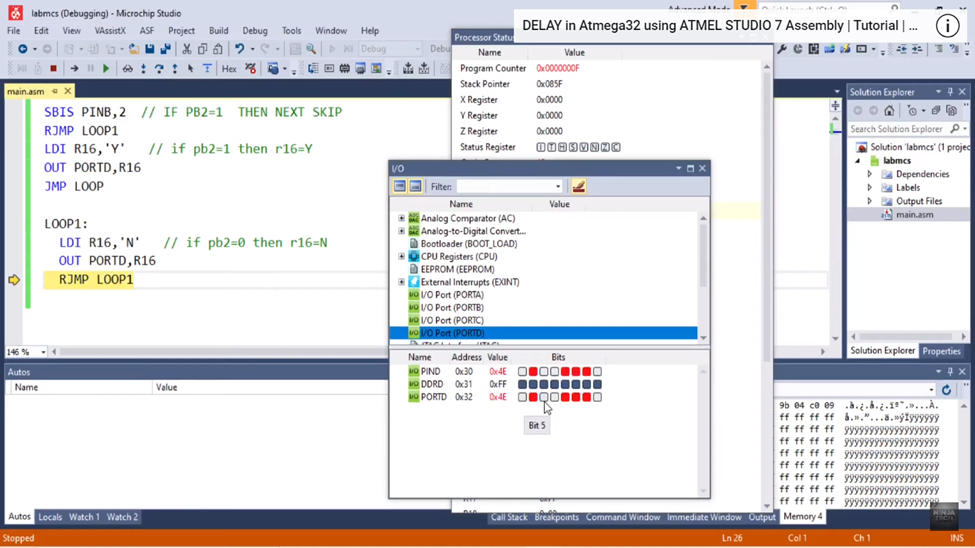
Now it jumped to the loop1. As the ASCII character ‘N’ has some value which is 4E and it has loaded in R16.
And that same value of ‘N’ has output on the port D as you can see below.
Conclusion
As we conclude our investigation into the nuances of value checking with the SBIS instruction in Atmega32 Assembly in Atmel Studio 7, we have traveled a distance beyond just lines of code. We have discovered the power of accuracy and effectiveness in microcontroller programming via this journey.
Thus, may the SBIS lesson serve as a beacon for you as you embark on your next coding adventure and learn how to write Atmega32 Assembly in the ever-changing Atmel Studio 7 environment.
For Complete Trial Watch the Video: Check Value using SBIS in Atmega32 using ATMEL STUDIO 7 Assembly
For more blogs explore the website: https://ninjatech.live/